Creating or Editing a Customer
Select ‘Customer’ from the main menu and then click the + (plus) button.
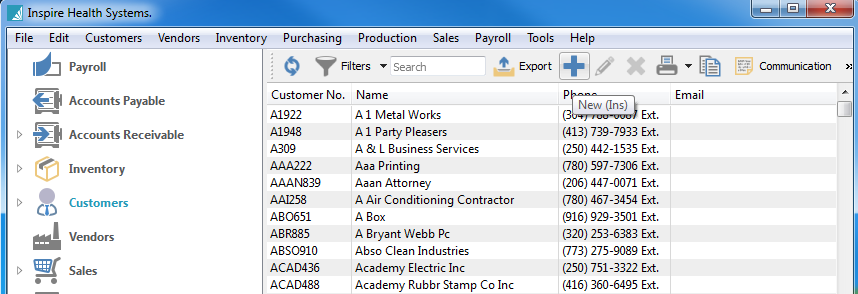
This will bring you to the customers main address screen. If creating a new customer the minimum data entry required is the customer code and a customer name.
Customer Header
Save – Saves a customer and leaves the customer window open
Save/Close – Saves a customer and closes the customer window
Delete – Deletes a customer.
- NOTE: A customer with history cannot be deleted.
Update Orders – This button will search for open sales orders and update any address changes including email addresses.
Navigation buttons – Allows the user to navigate the customer list. The navigation order will respect the filters and sort that was set before editing the customer.
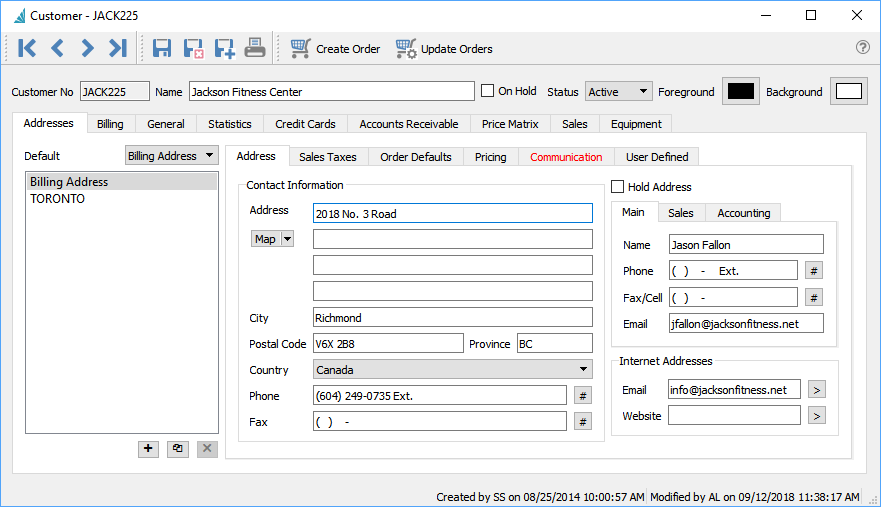
Customer Addresses
Code – Must be unique
Name – The customer name that will appear on reports/forms
On Hold – If this check box is selected then no transactions can be entered for this customer.
Status – The customer can be set to one of 3 statuses, Active, Inactive or Prospect. A customer can only be made inactive if they have no balance in Accounts Receivable. The prospect setting is normally used when we are still trying to earn a company’s business. Each of these statuses can be used to create filters so that you can view only the customer that you want.
- NOTE: A user needs to have the security setting of “Customers/Show Inactive Customers” on to see be able to see inactive customers.
Colours – Each customer can be colour coded with a background and foreground colour. For example a company may want their foreign customers to stand out on their customer list and would therefore colour code them in blue.
Addresses – Click on the [+] button to add any number of ship-to addresses. You can also delete ship-to addresses by clicking the [X] button. The button between these two [Append] provided the ability to copy an existing address to a new ship-to address. By default only the billing address is associated with a sales order, however you can change this by selecting one of the ship-to addresses to be ‘Default’. Then every sales order will default to having the billing address as well a selected shipping address. This is usually done for drop ship purposes.
Map – This button opens the address in either Google Maps, OpenStreetMap or Bing.
Contacts – These 3 contact labels can be edited to suit your requirements in Company Settings/Customer.
Hold Address – This puts a ship-to on hold so orders cannot be created for it
Email Addresses – All of the email addresses including those in the ship-to’s are available when emailing reports or forms to a customer.
Created / Modified by – The user and date/time the record was created and the last time it was edited.
Sales Taxes Tab
![]()
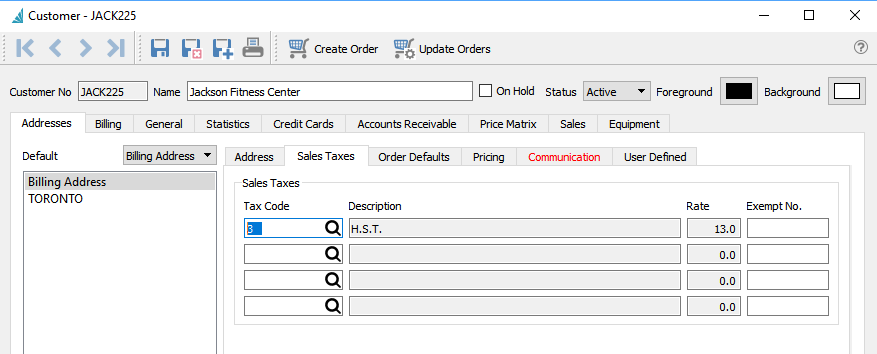
Sales Taxes – The sales tax code can be selected from the list that was setup in Edit/Sales Taxes. Once it is selected the code, the description and the rate will be displayed. An exemption number can also be added if the customer is exempt for a tax. This exemption number will then be added to a sales order when it is created.
Order Default Tab
![]()
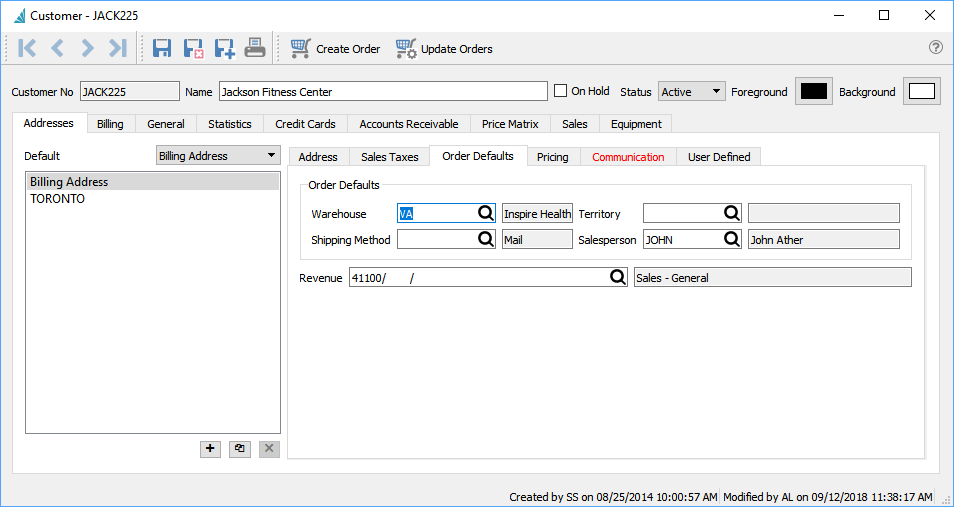
Warehouse – If the company setting ‘Sales Orders/Use customer’s default warehouse’ is on then this warehouse it will be used by default on a sales order.
Shipping Method – This is the customers default shipping method will get added to sales orders. It is selected from a list that is created under Edit/Ship Via.
Territory – This is the customers default territory and will get added to sales orders. It is selected from a list that is created under Edit/Territory
Salesperson – This is the customers default salesperson and will get added to sales orders. It is selected from a list that is created under Edit/Salespeople
Revenue – The GL account that revenue will be posted to if “Company Setting->Customer->Override Sales Account” is set on
Price Tab
![]()
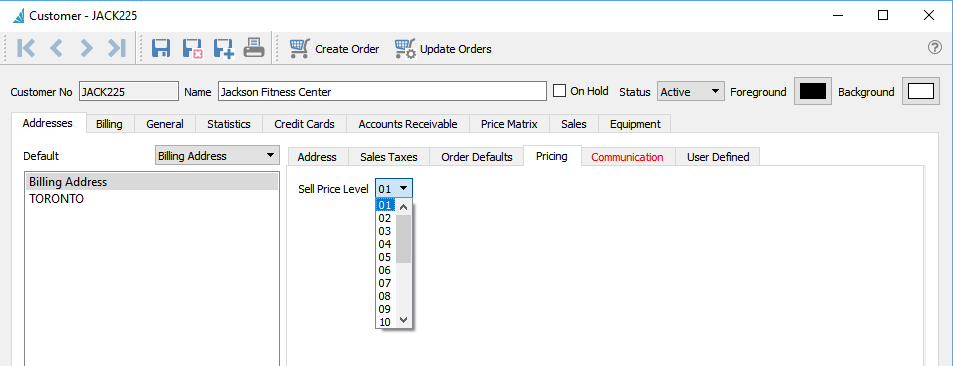
Pricing – A customer can be set for 1 of 20 different sell prices. This will then set the item at the corresponding level set in inventory. The multi-currency setup can further define a price level for a particular currency. Then when a customer is set for that currency it will select that price level automatically.
Communications Tab
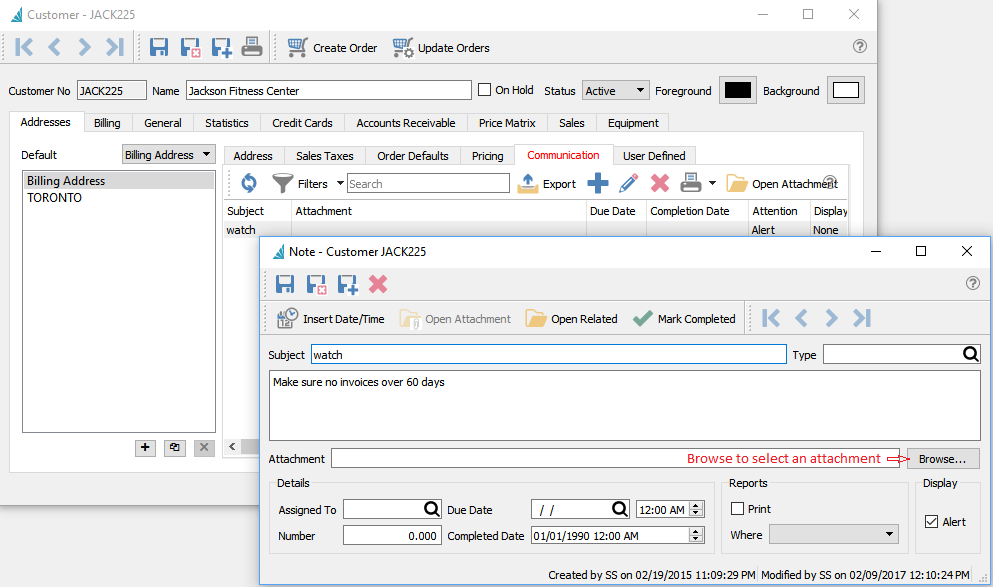
Communications – A communication or note can be added to a customer for later follow-up. If it is assigned to a user and it has a due date added, then this will be presented to the user when it is due or overdue every time they log into Spire. The communications tab will also be red if there are any notes for this customer.
Any number of notes can be added to a customer and have several options:
Insert Date/Time – Click this enters current date and time on the note
Open Attachment – Opens the attachment on the note
Open Related – Opens the item that the note was entered on
Mark Completed – Sets a completion date on the note
Subject – Gives the note a subject
Type – This groups notes by a type and must come from lookup list if used
Body – The details of a note
Attachment – Show the link to the attached document
Assigned To – Who is responsible for this note or task
Number – A numeric field that be used for custom reports
Due Date/Time – When the assigned communication/task is due for completion. If the user logs into Spire and there are communications that are due today or earlier they will be ‘popped’ in a message.
Completed Date – Enter a date here when the task is completed.
Print – Select if the contents should be printed on one of below:
Where – Select what document the message should be printed on. Spire’s stock reports have these messages on them, however they are defaulted to hidden so your consultant can un-hide them for you. The choices are:
- Packing Slip
- Picking Slip
- Booking Order
- Invoice
- Order Confirmation
- Quote
- Purchase Order
- Sales Order
- Work Order
- Alert on Orders – If the message is set as an alert, the message will be presented to the user when the customer is added to a sales order or when it is edited. If the alert is not set, the communications ribbon at the top of the sales order, will indicate that there is customer communication.
User Defined Tab
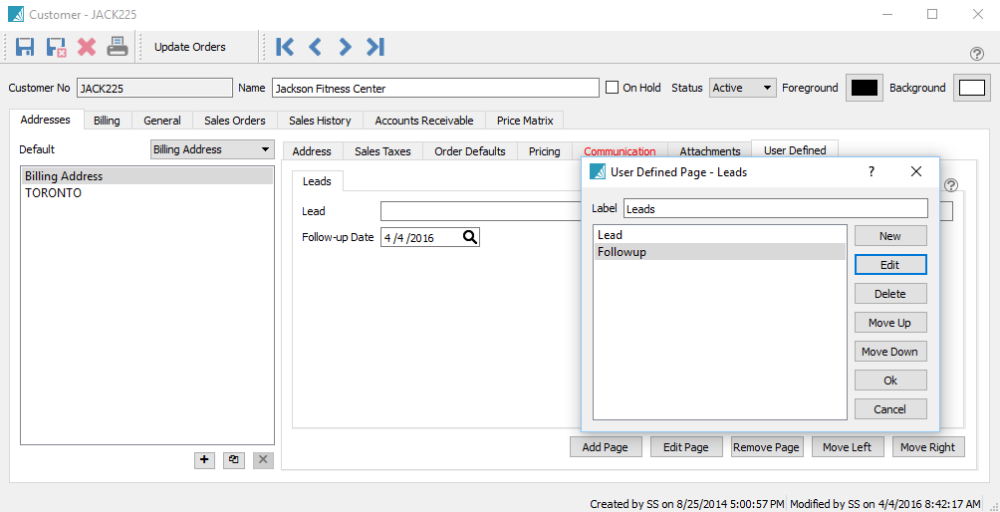
User Defined Fields – UDF’s can be added to a customer to track extra information that Spire does not keep by default. The user can add additional tabs and define the fields and field types to store this data. The structure for the customer billing address can be different than the ship-to addresses.
Billing Tab
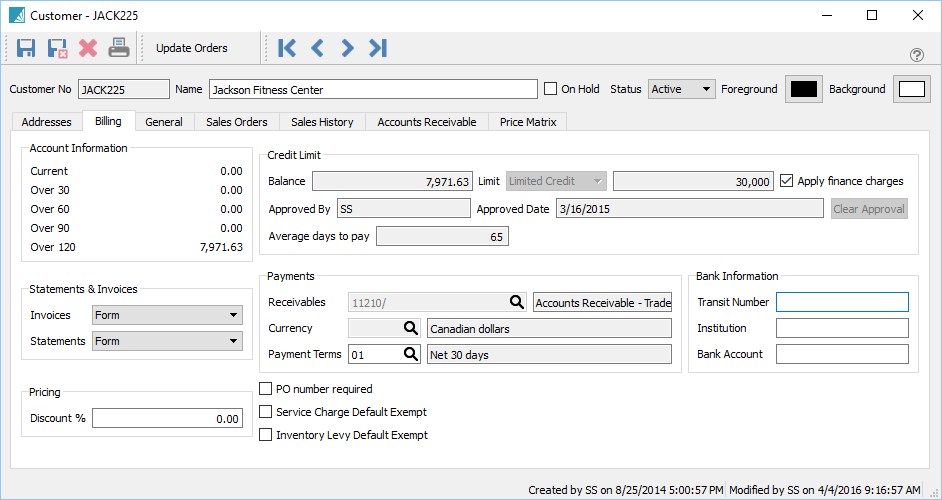
Account Information – Shows the aged accounts receivable for this customer. The aging days that are used are setup in Company Settings/Accounts Receivable.
Statements & Invoices – User can select how the customer invoices and statements are sent. The choices are Form, Email, Form and Email or none. When printing, Spire does not use these settings, however this field is one of the columns on the customer list so the user can sort or filter by this and select all of the customers by form type before sending.
Discount – The default discount that is applied to the total sales order.
- Caution – this discount is applied after the line by line discounts.
Balance – The customers accounts receivable balance.
Limit – The customers credit limit.
Apply Finance Charges – When checked, finance charges will be applied to the customers AR. The ‘Apply Finance Charges’ button can be checked on the accounts receivable list or inside a customer AR screen.
Approved By – The initials of the user that lasted edited the customers credit type and/or limit.
Clear Approval – Clears the credit limit to zero.
Average Days to Pay – The average time it takes a customer to pay their accounts receivable.
Receivables – The GL account that this customers AR is posted to
Currency – The currency that the customer is billed in.
Payment Terms – The default terms that get added to a sales order. Once on the sales order it can be changed to other terms.
Bank Information – For Canadian banks, this is used for EFT to create a CPA1464 file (aka005) from all accounts receivable transactions that have payment terms of ‘PAD’
- Transit Number – The Customer’s bank transit number
- Institution – The Customer’s bank institution number
- Bank Account – The Customer’s bank account number
PO Number Required – When saving or editing a customers sales order the user will be warned that a purchase order number is required by this customer. Once the sales order is Processed, Shipped or Invoiced the PO number will be required.
Service Charge Default Exempt – If the Company Setting Sales Orders/Surcharges is active, this customer will not be charged this fee.
Inventory Levy Default Exempt – If a levy is set on an inventory item, this customer will be exempt from it.
Customer General Tab
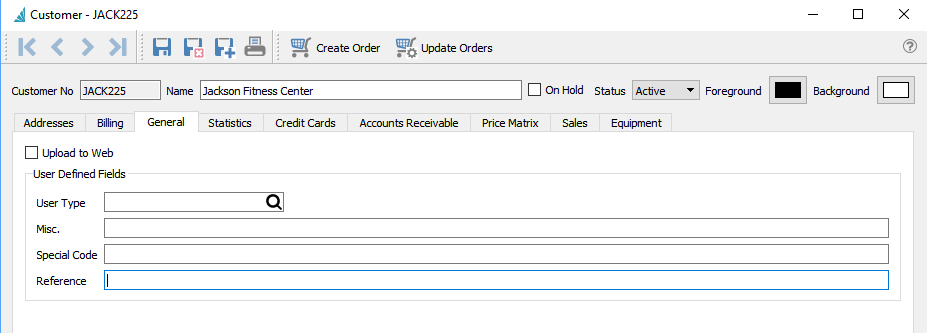
User Type – This is an alphanumeric field that can have its label changed in Company Settings/Variables. This field is usually called ‘Customer Type’ and Spire’s price matrix uses this to define pricing for groups of customers. This field also has an associated table where values can be selected from.
Misc. – This is an numeric field that can have its label changed in Company Settings/Variables.
Special Code – A code from A-Z can be added to the customer. It is not used anywhere in the program but simply a way to rank a customer and be able to filter by it.
Reference – A free field for info about the customer.
h3.Statistics
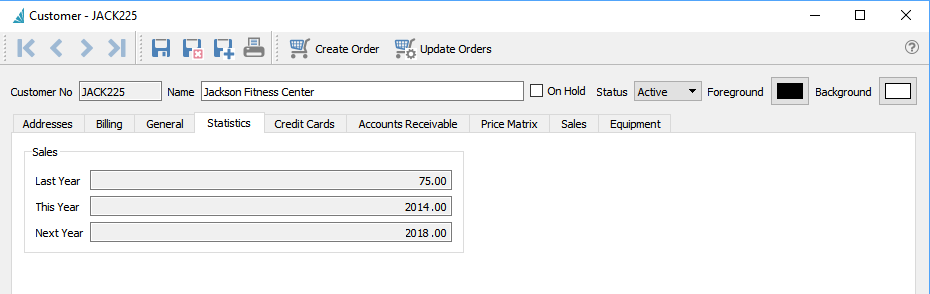
Sales this year, last year and next year
Credit Cards
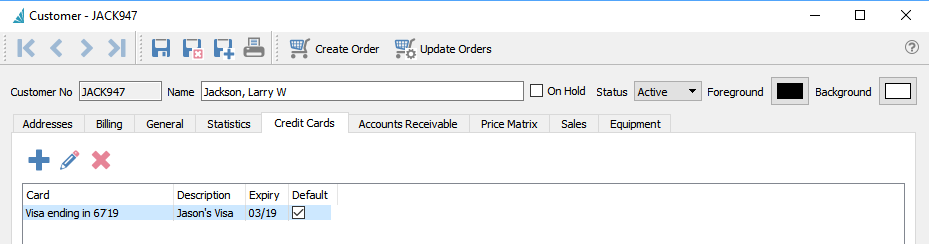
If the company has a subscription with the credit card processor then the credit cards can be entered here. Only the last 4 digits and expiry are show, The rest is stored in the processors secure vault.
Customer Accounts Receivable Tab
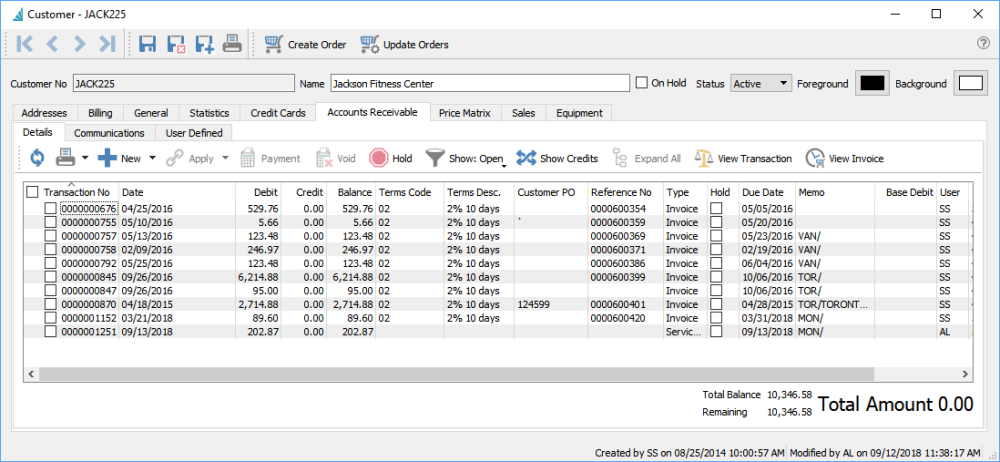
Accounts Receivable – This gives full access to the accounts receivable for this customer. Data can be added here and invoices can be paid here. You can also view the applied accounts receivable data for this customer. If a customer has a balance of zero and everything is fully applied, then this is the only place to be able to see a customers accounts receivable info.
Customer Price Matrix Tab

Price Matrix – On this tab you can add/edit/delete and report on a customers special pricing. See the ‘Price Matrix’ Module for a full description.
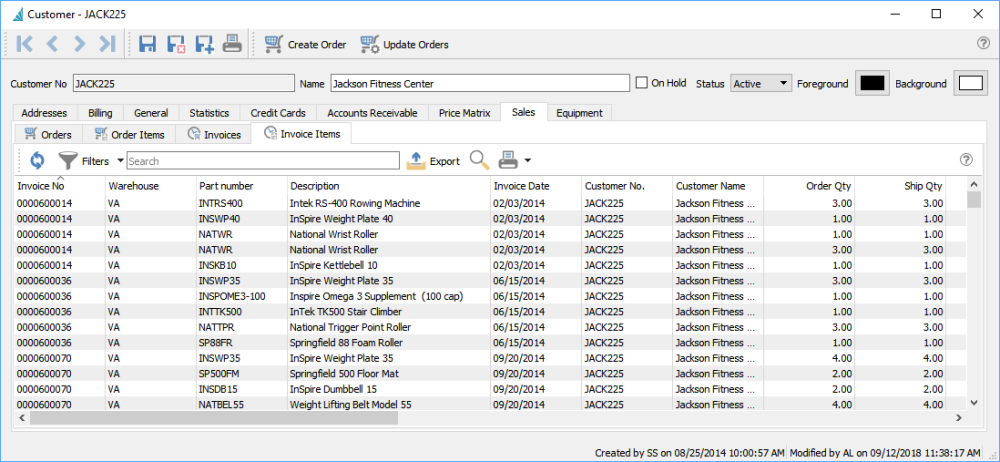
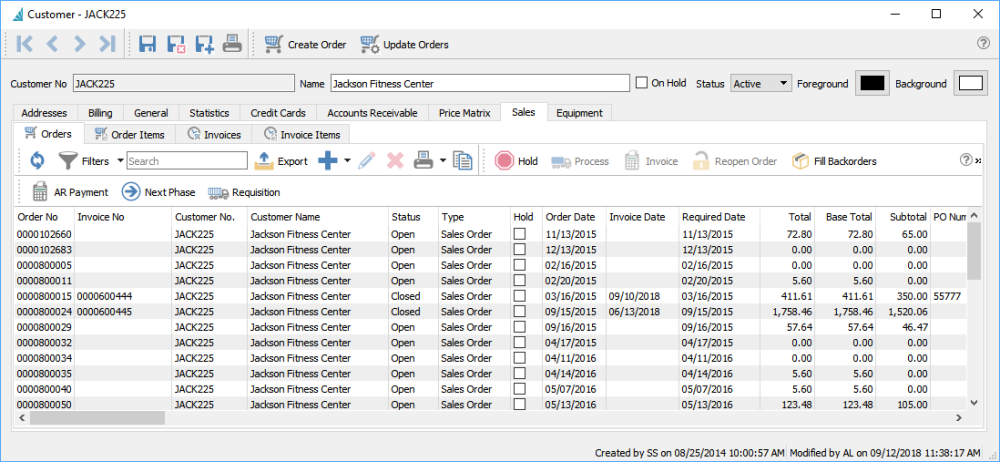
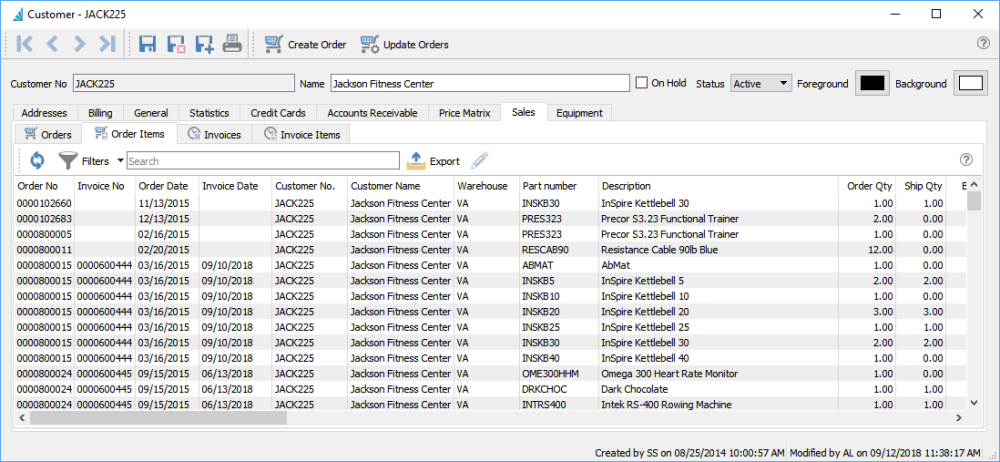
Sales Tab
On the sales tab there are 4 sub tabs containing:
- Orders – these are the open orders for the customer
- Order Items – these are the details of all orders shown together
- Invoices -posted invoices for this customer
- Invoice Items – all details of the posted invoice for the customer
Orders – The orders can be edited, processed, shipped to and invoiced just like they can in the sales order module.
Sales History – This is a list of all of the customer’s sales history. It can be viewed at the invoice header level or details of all invoices. Filters can be set to limit the amount range of invoices shown. The invoice can also be drilled into to view and edit non financial information if the user has security to do so. The invoice can also be copied or credited when viewing it.
Orders
Order Items
Invoices

Invoice Items