Inventory Transfer transactions are used to move items from one warehouse to another, with an optional markup charge or freight cost for the transfer.
Before entering and posting any inventory transfers, you must first open Company Settings/Inventory and select a default General Ledger account for the Transfer Markup Account for any additional charges that would generate a GL entry, such as adding overhead for stocking inventory. Usually an income account is selected so that when inventory is debited for the increase, this Transfer Markup account is credited. The warehouse receiving the transfer will realize a higher cost for that item that the sending warehouse, and will be offset by the transfer so that the bottom line does not change.
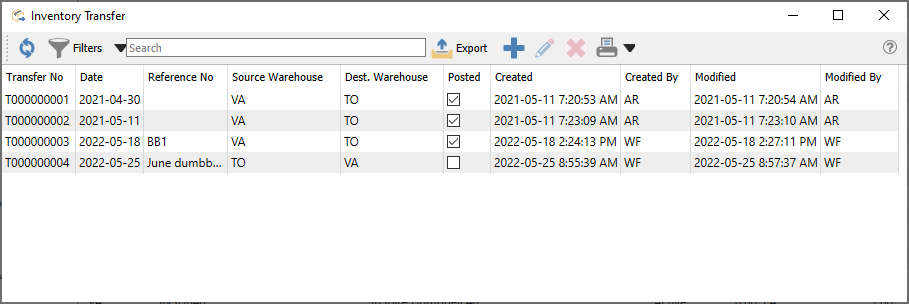
Inventory transfers can be initiated from two different places in Spire. One place is from the top Inventory menu and the Inventory Transfers selection. This opens the Transfer list window, and a new group of item Transfers can be created from here with the Plus button, from which items are selected one at a time.
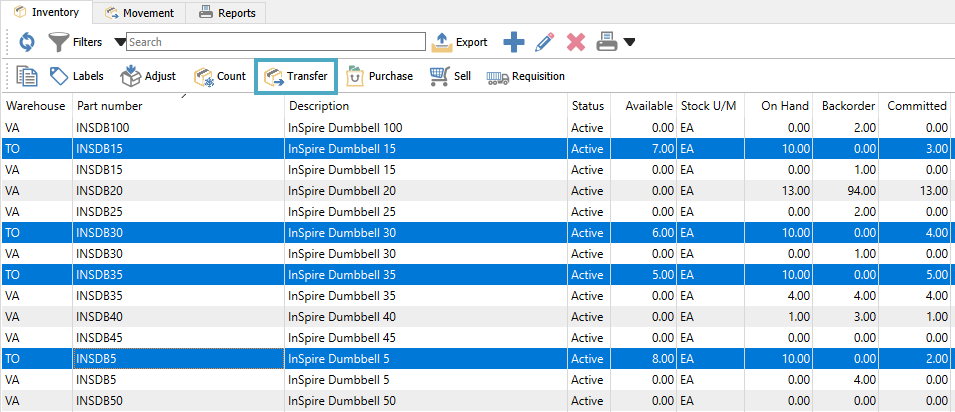
The other place is from the Inventory list, where one or more items to transfer are highlighted in the grid, and then the Transfer button in the toolbar is clicked to start the transaction.
Transfer Header
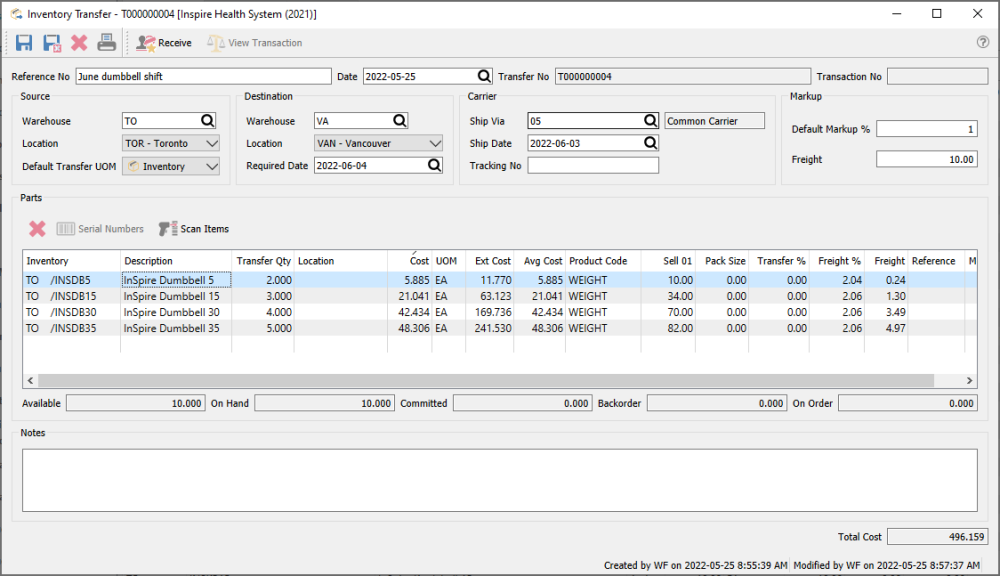
Save – Saves the transfer transaction, and assigns a transfer number for a new transaction. The quantities of items on this list have been marked committed in the warehouse while they are in transit, so that they are not shipped from a sales order, prior to confirmation and posting.
Save Close – Performs all the same processes as indicated for Save above, and the transfer transaction window is closed.
Delete – Deletes the transfer transaction, if it has been saved but not yet posted.
Print – Prints the Inventory Transfer list or other reports, either for items about to be moved for confirmation, or the changes for the audit trail.
Receive – Commits the transfer changes to the database. The committed quantity value of all items from this transfer are removed, and if either Markup or Freight was included then a new GL transaction is saved with a debit to the Inventory control account and credits to the Transfer Markup account and Accrued Freight account. Posted transfers cannot be deleted and are available for lookup in the future.
Reference No – Enter text to identify the purpose of the transfer transaction.
Date – The transaction date that is used for stock movement and the General Ledger transaction.
Transfer No – Transfers have a unique 9-digit number, prefixed with T, automatically assigned for transaction identification when the transfer is saved. The next Transfer number is found in Company Settings.
Transaction No – The GL transaction identification, populated when the transfer is posted.
Source Warehouse – The warehouse where items are transferred from. Items can only be added from this warehouse.
Source Location – If you have Locations enabled in Company Settings, and the Inventory Control account is configured with a Location segment, the posted GL transaction will update the account with the respective location segment.
Default Transfer UOM – When adding a new item to be transferred, use either the Stocking, Selling or Purchasing Unit Of Measure from the item by default.
Destination Warehouse – The warehouse where all items are transferred to. You cannot transfer to multiple warehouses in a single transaction. If the item has not yet been created in the destination warehouse, a new record will be copied from the source warehouse item when the transfer is posted.
Destination Location – If you have Locations enabled in Company Settings, and either the Inventory Control or Transfer Markup account is configured with a Location segment, the posted GL transaction will update the account with the respective location segment.
Required Date – Identify the target date for completing the transfer.
Carrier – Select the shipping code, date and tracking code of the transfer if you want to include this information on reports or for future inquiry.
Default Markup % – When adding new items to the transfer transaction, this value will be used as the Transfer Markup % for the item, increasing the Total Cost. Changing this value does not update items already added. If you create transfers by selecting items from the Inventory List, you should set a Default value for this field in Company Settings, otherwise those items will be added to the transfer with a zero Transfer %.
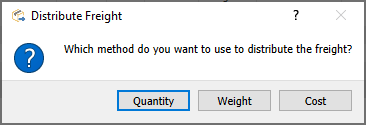
Freight – The moving cost of transferring the items. When this value is edited, you are presented with a choice to allocate the value across all details either by Quantity, Weight or Cost. You should enter this value after all item details to ensure the proper freight distribution.
Transfer Body
Delete – Removes the highlighted line from the transfer, which is not possible for posted transfers. If the transfer had been saved, the committed quantity for that item will be cleared.
Serial Numbers – Available to use only if an item that supports either serial numbers or lot numbers is highlighted. You need to identify which numbers are being transferred.
Scan Items – For items with UPC codes defined, scanning a barcode will increment the Transfer Qty value by 1 for the associated item and unit of measure. Serial or Lot numbers can also be scanned for selection.
Inventory – Item part number, and warehouse code which must match the Source Warehouse value.
Description – Description of the part number.
Transfer Qty – The Quantity to transfer in the selected unit of measure. Only positive values are allowed.
Cost – Cost of the item in the unit of measure for this line. This defaults from the average cost, but this can be modified. A Company Setting for Inventory exists to ‘Update current cost from transfer’, if you want to change the Current Cost on the inventory item to this modified value.
UOM – Unit of Measure to be adjusted. This value defaults from the specified UOM in the header, but a different unit can be chosen. Changing the unit will not recalculate the Transfer Qty, just the unit and extended costs.
Ext Cost – The calculated value from the Transfer Qty, Unit Cost and Unit of measure conversion factor.
Avg Cost – The average unit cost value from the inventory item, which cannot be edited here.
Product Code – Displays the Sales Department value from the inventory item, which cannot be edited. This determines the Inventory control account posted to by the transfer.
Transfer % – Apply a markup amount for this item transfer, multiplied by the Extended Cost. This value defaults from the Markup % in the Header but can be edited.
Freight % – Apply a freight amount for this item transfer, multiplied by the Extended Cost to determine the Freight value. This value defaults from the distribution calculation when the Freight amount in the Header is edited, but can be modified. Changing this will update the Freight in the Header.
Freight – Apply a freight amount for this item transfer, calculated from the Extended Cost and the Freight %. This value defaults from the distribution calculation when the Freight amount in the Header is edited, but can be modified. Changing this will update the Freight in the Header.
Sell 01 – The Unit selling price from the inventory item, which can be edited for updating the inventory record but not affect accounting entries.
GL Account – The Transfer Markup GL account that this line will post to, which defaults from a value in Company Settings but can be edited. The Inventory control GL account from the sales department of this item will be the balancing line of the GL transaction when posting.
Location – The warehouse location description for this item for reference, different than the Location in the Header which affects accounting. This can be edited and the new value will update inventory.
Pack Size – An informational value perhaps related to unit of measure or a sales target. This can be edited and the new value will update inventory.
Reference – Text you can enter for information about this Inventory item transfer.
Memo – Text you can enter for information about this Inventory item transfer.
Transfer Footer
Notes – A larger volume of text that can be added for this transfer transaction a a whole.
Total Cost – Total sum of all the Extended Costs and any applied Markup and Freight of the Transfer item details.
Reports
Either from the Transfer List screen for a selection of one or more transfers, or when editing a particular transfer, you can print various reports or forms.
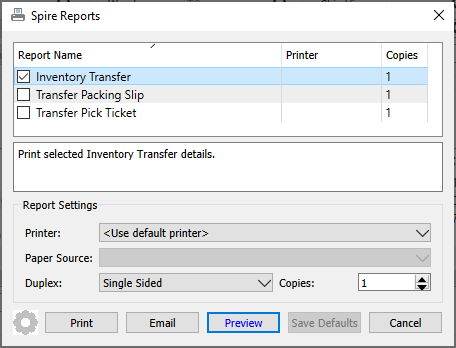
Inventory Transfer – Prints a list of items being transferred between warehouses, with included markup or freight where applicable.

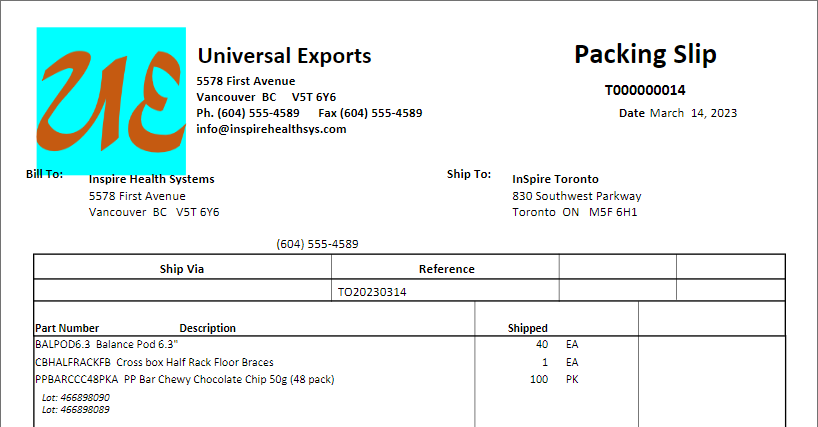
Transfer Packing Slip – Prints a form that includes the list of items being transferred, which is typically meant for the recipient of the items.
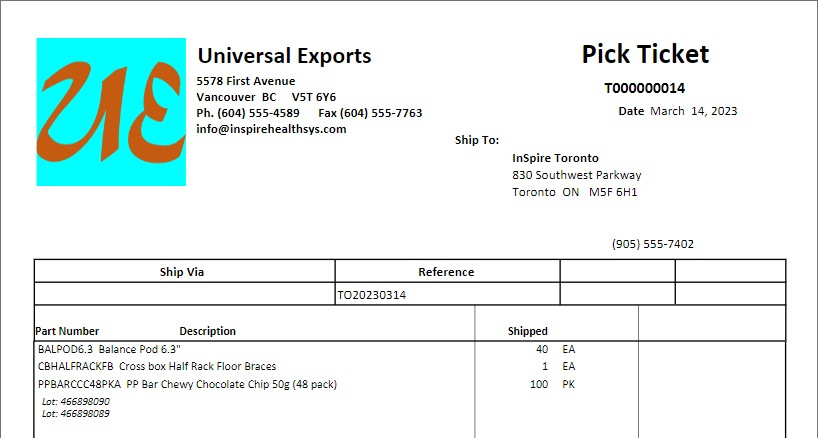
Transfer Pick Ticket – Prints a form that includes the list of items being transferred, which is typically meant for the warehouse sending the items.
Video Instruction

