Each general ledger account can reconciled against a statement. The most common use is for banks and credit cards, but any account can be reconciled.
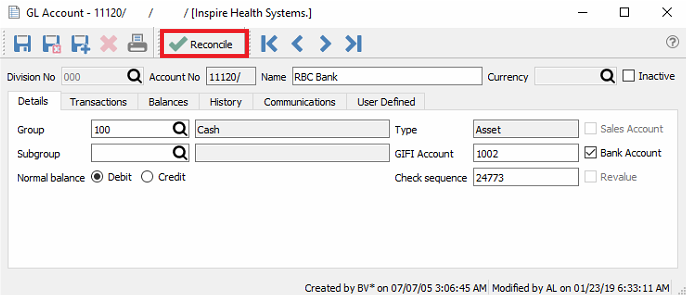
To access the account reconciliation, from the General Ledger module, edit the account to be reconciled and click the ‘Reconcile’ button. If divisions are turned on the reconciliation should be done on the ‘000’ (consolidated) division. This is because if postings are done to multiple divisions then not all transactions will show up except in the consolidated division.
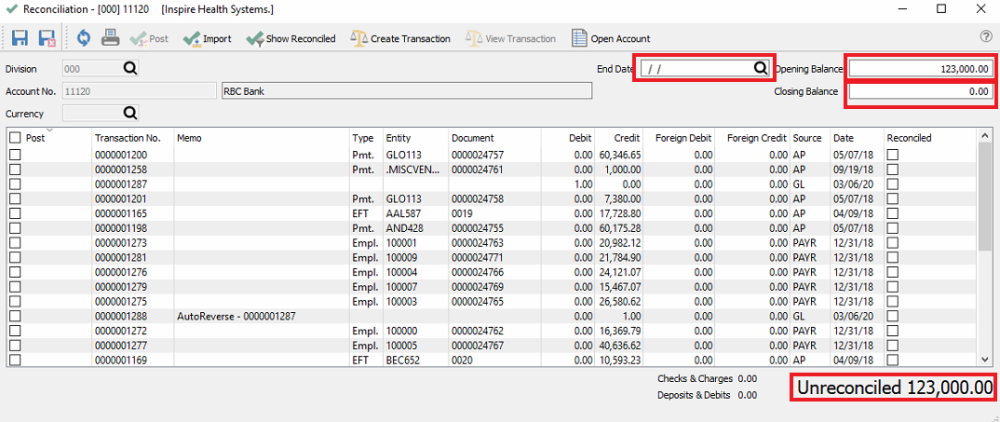
The Reconciliation screen will open for processing, and the Opening Balance amount will be carried over from the previous reconciliation closing balance. From the statement being reconciled, enter the end date and the closing balance. If any transactions have been posted with a date later than this statement end date, they will be suppressed from display so that only those transactions that can be cleared are visible. The Unreconciled total at the bottom of the screen is the difference between the Opening and Closing Balances, and recalculated every time a transaction is marked as Reconciled.
Save – Save your work in progress.
Save & Close – Save your work in progress and close the reconciliation screen.
Refresh – Refresh transactions posted elsewhere. You can complete and posts transactions that include this account while the reconciliation screen is open, and then refresh the list.
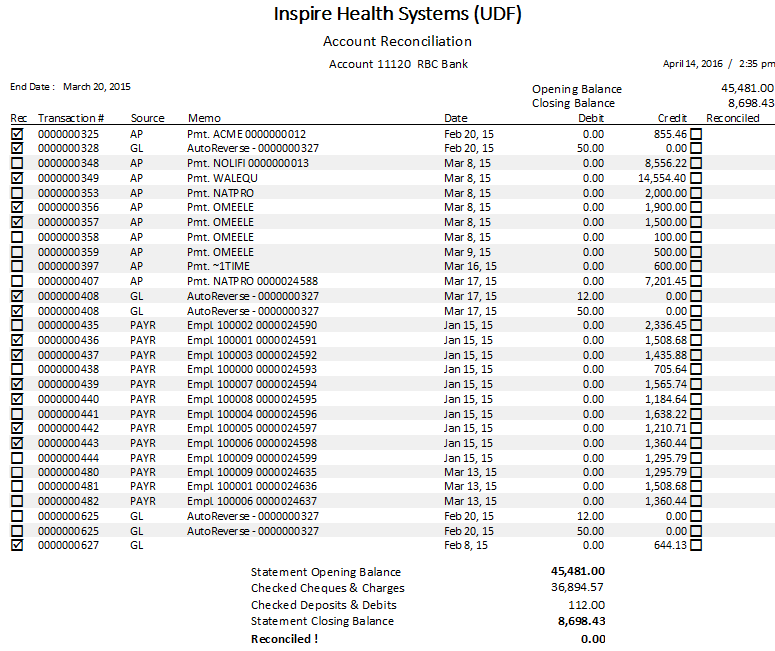
Print – All Reports with a template of ‘Account Reconciliation’ will be presented.
Post – Post the reconciliation. You will be prompted to print the report first.
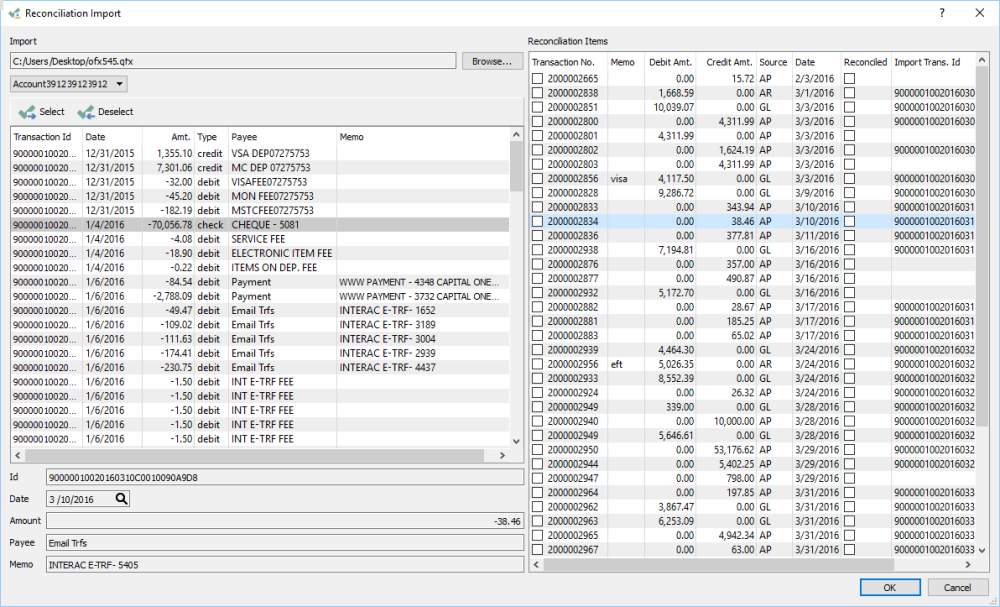
Import – Import an .ofx or .qfx formatted file from the bank that contains transactions that were posted to the account. Any transactions that match the dates and amounts will get the reconcile flag added automatically.
Show Reconciled – Shows all transactions for this account, including those that were previously reconciled. Either for locating an old transaction or to reverse the reconciled status of transactions incorrectly marked.
Create Transaction – Starts a GL transaction entry that automatically inserts the account being reconciled on the first line.
View Transaction – View the transaction entry of the highlighted line.
Open Account – Opens the GL account for viewing, though it likely is already open in order to access reconciliation.
End Date – The statement close date, which also suppresses all transactions later than this date.
Opening Balance – The amount that gets carried forward from the previous reconciliation closing balance.
Closing Balance – The closing balance of the statement being reconciled.
The ‘Import’ button can be clicked and the user can browse for an .ofx or .qfx file that was previously downloaded from web banking. It will then automatically reconcile the transactions that match dates and amounts. Those that don’t match will appear in the grid on the left side.
Whether the statement transactions are selected manually or matched through importing, when the reconciliation is balanced, the bottom right field will indicate “Unreconciled 0.00”.

You can then click the ‘Post’ button to start committing the changes, and get the opportunity to print the account reconciliation reports. Then the reconciliation posting can be completed.
Reversing a Reconciliation
Sometimes an error is made after the account reconciliation has been posted, that needs to be reversed and reselected.
First of all make sure there are no check marks in the reconciliation screen because reversing should not be done at the same time as clearing other transactions. Then click the “Show Reconciled” button to display all transactions previously reconciled including those in error.
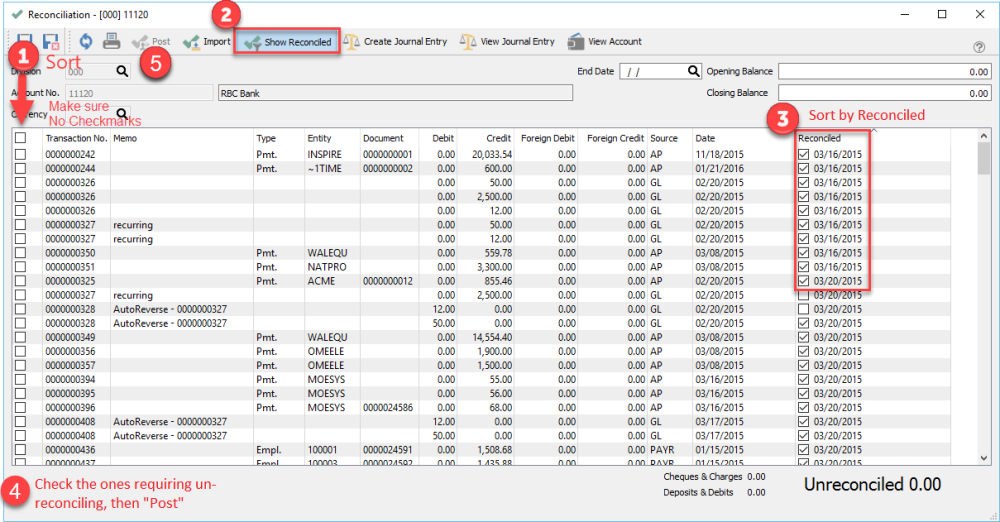
- If you wish to reverse all transactions for a particular reconciliation, sort the list by the reconciled column to group them. Then in the Post column, select all transactions for the reconciled date that needs to be reversed.
- You may also select only individual transactions to reverse, rather than all transactions from an entire reconciliation posting.
- To maintain the integrity of the opening balance, you should calculate a new closing balance from the opening balance and the transaction amounts being reversed, so that the Unreconciled calculated amount at the bottom is 0.00.
- Once completed, click the ‘Post’ button to start the reversal process and choose to print the account reconciliation reports if desired.
- Click OK to post and the reconciliation status for all selected transactions will now be reverted as Open, and any corrections can now be made as required.


