
The communications tab appears in most modules and master records. It allows a user to enter notes that can then be assigned to either the current user or another user for followup on the specified date. While it is not a Customer Relationship Management system it can assist your team in keeping informed on your customers activities and communications.
The list of Communications can be opened from either the module list at the left or the top Edit menu.
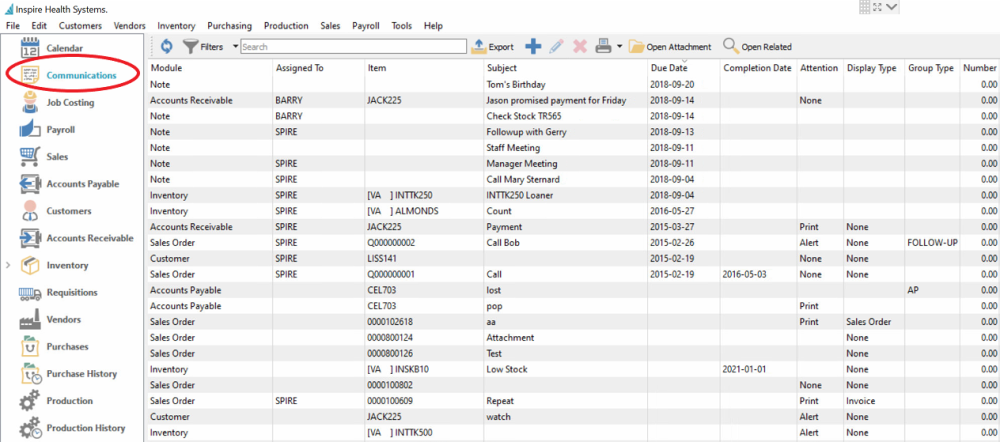
Filters – Set a filter to display only the communications that the user wants to see. The most common one is an “Assigned To” filter so the user to only see their own communications.
Export – Exports the list of communications to Excel or .csv based on column and position selection.
Add – Adds a communication.
Edit – Edits a communication.
Delete – Deletes a communication.
Print – Any report that has ‘Communications’ as a Crystal Reports template will be presented.
Open Attachment – Opens the first attachment, such as a file, web link etc, assigned to the communication. This attachment is displayed on the grid.
Open Related – Opens the module and record for the source of the message.
Some information is included on the communications grid that cannot be edited by users:
Module – The module where the communication was created.
Item – The record for where the communication was created. For example the customer number, sales order number or inventory item.
Created Date – The date it was created.
Created By – The initials of the user that created the communication.
Modified Date – Date this communication was last edited.
Modified By – The users initials that last edited this communication.
New communication Notes can be added from here, or existing notes or any other module communications may be edited.

Insert Date/Time – The system date and time will be added to the text memo box at the end of the entered text.
Add Attachment – Include a link to a saved file such as an Excel spreadsheet or an image.
Add Link – Include a link to a Web URL or a saved file. A linked-to file should ideally be a location available to all users.
Open Related – Opens the module and record for the source of the message.
Mark Completed – Click this to set the Completed Date and Time values from the system.
Subject – The subject the user put on the communication.
Group Type – Choose from a list of company-specified Note types to categorize the note. For example, “Follow-Up” or “Important”.
The text memo box is where the note information is entered, and under this is listed all attachments which can be opened by clicking the one desired to access.
Details
Assigned To – The user’s name that the communication is assigned to.
Number – Extra numeric field, used for reporting purposes.
Due Date – Fields for the date and time when the assigned communication is due for completion.
Completed Date – Fields for the date and time when the communication was marked as completed.
Reports
Print – Enabling this option will printed the note text on whichever form was selected for Display Type.
Display Type – The form that this communication should print on. For example on Invoices or Purchase Orders.
Display
Alert – Enabling this option will pop up the note text in an alert window when editing a transaction like a sales or purchase order, or when the item, customer or vendor is added to a transaction.
The Print and Alert statuses will display in the Attention column of the communications grid if either are selected, or Both displays when both settings are enabled.