
Spire integrates with Microsoft Word to create a Mail Merge database based on selected customers, to print or email documents such as mailing labels or communications for all of them, containing personalized customer database information. In the Customers module, either choose the entire customer list, a specific selection of highlighted customers, or use Filters or the Search box to restrict the list of customers to those of interest. When all required customers are highlighted in the customer list grid, click the Mail Merge button to select or create the Word document used for generating the merge documents.

Set the number of blank forms to generate before the merged documents, generally only used when printing labels on dot matrix rolls. And specify if you want more than one copy of each document to print.
If the selected document is already complete and ready for printing to paper, you can click the Print button to immediately send all customer documents to the printer, or the Preview button to load all merged documents either for investigation, saving or printing. Otherwise you can click the Edit button to open the document in Word for further updating or for emailing the merged documents to each customer. All choices create the customer selection as a database source file in CSV format for Word to use.
In order to include information from the customer database into your document, you need to add fields to represent the data. From the Mailings tab, choose Insert Merge Field to see a list of the available fields you can include from the recipient source data file.

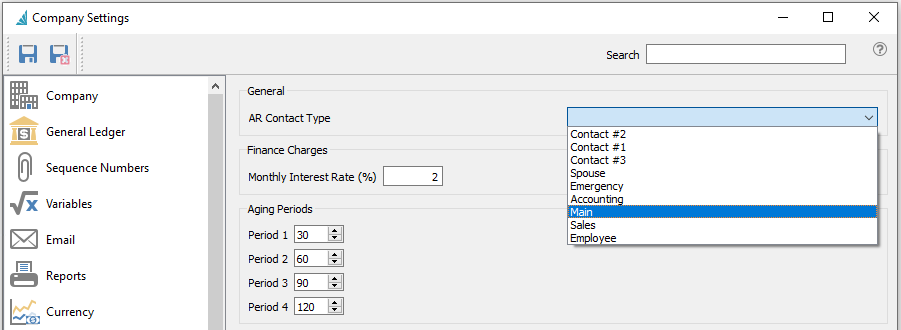
Because customers support multiple contacts, to specify which contact information will print on mail merged documents, you must open Company Settings and the Accounts Receivable area to set the AR Contact Type. The information for the contact assigned this type will be used.
Because customers support multiple shipping addresses, if you wish to use mail merge fields from a shipping address, you must specify a shipping address code as the Default instead Billing. Then contact and address information from the shipping address will populate the respective mail merge source fields, in conjunction with the AR Contact setting above.

Other standard Word mail merge procedures you can perform while editing the document include editing the recipient list to exclude any customers previously selected that you no longer want to generate forms for, or Preview Results to ensure the merge information is correct and complete. From the “Finish & Merge” button you can also print the documents to paper or email them to customers directly.
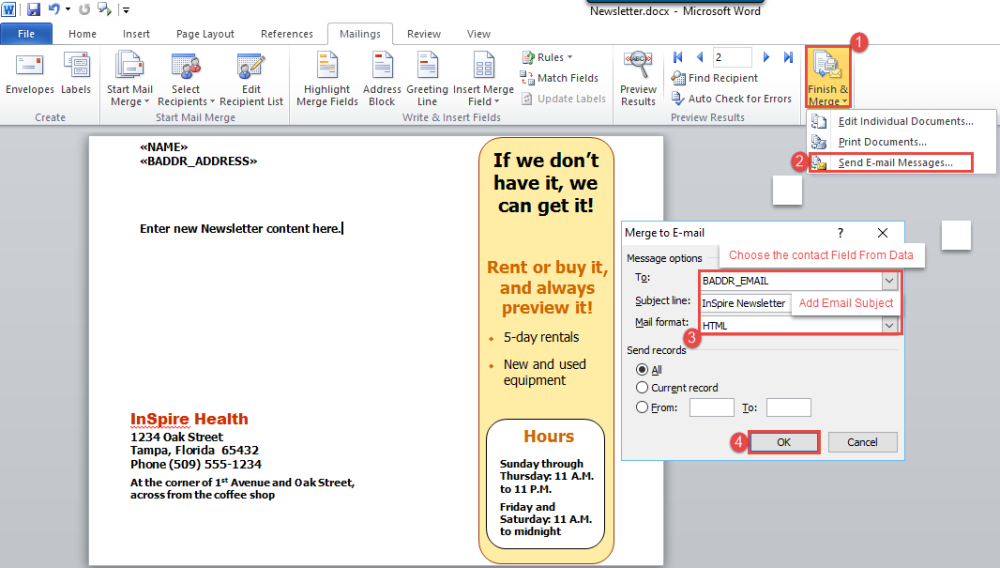
If you choose to email, you need to select the email address in the ‘To’ field from the mail merge field list, which should be either billing address ‘BADDR_EMAIL’ or ‘BADDR_CONTACT_EMAIL’ field. Also include an email subject and format – either plain text, as an attachment or the recommended HTML with embedded formatting. Click ‘OK’ to have Word start generating and emailing the documents to the customer list.
Video Instruction – Customer Mail/Email Merge